Hardware
- Raspberry Pi B xy as the Modbus master
- CODESYS Control Win V3 as the Modbus slave
Requirements for the Modbus master
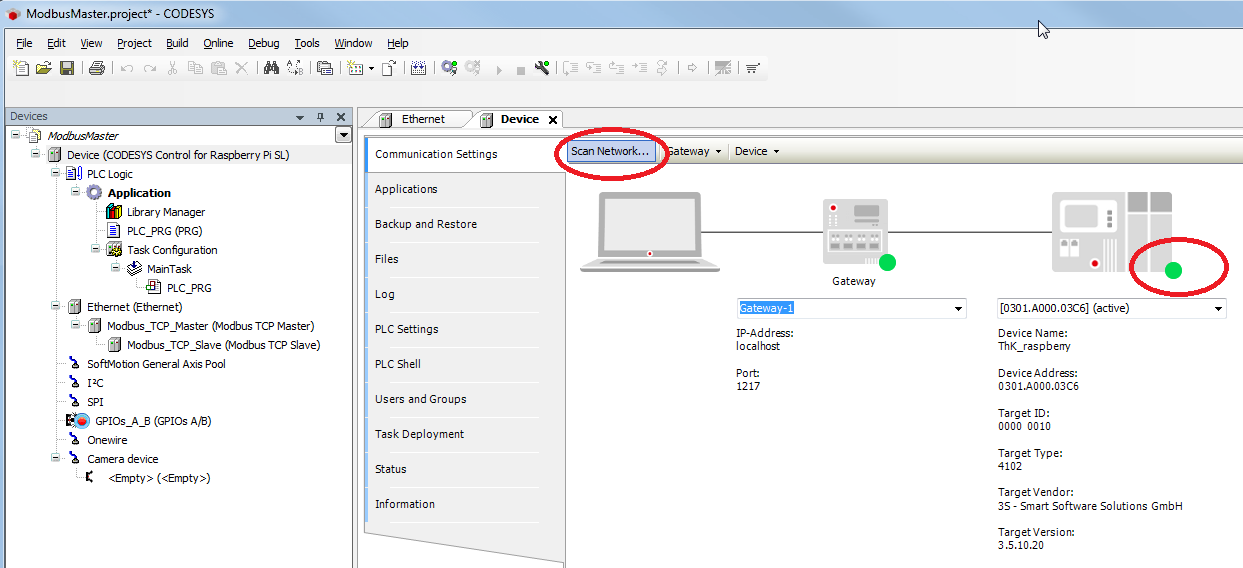
- Create a "standard project" and select "CODESYS Control for Raspberry Pi SL" as the device.
- Define the target system via Network search.
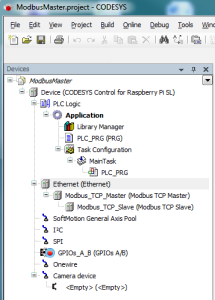
- Insert an Ethernet adapter, a Modbus_TCP_Master and a Modbus_TCP_Slave in the device tree.
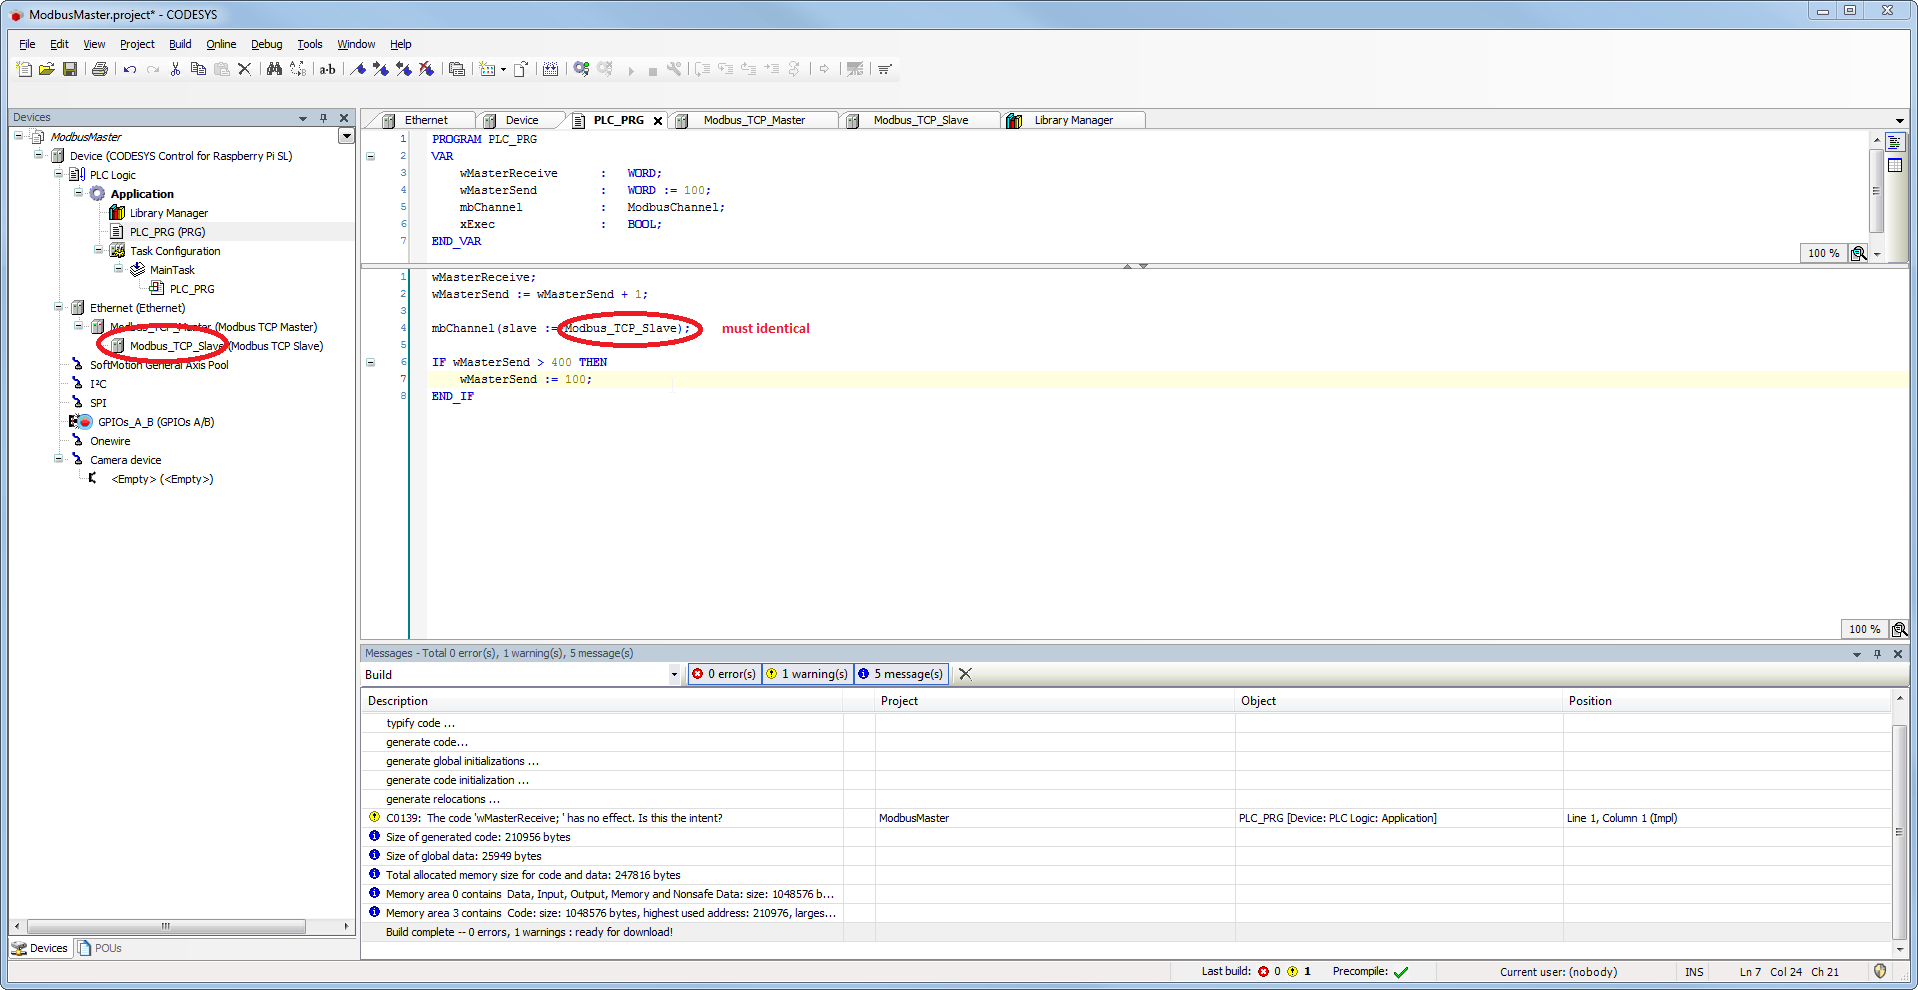
- Adapt the "PLC_PRG" as follows:
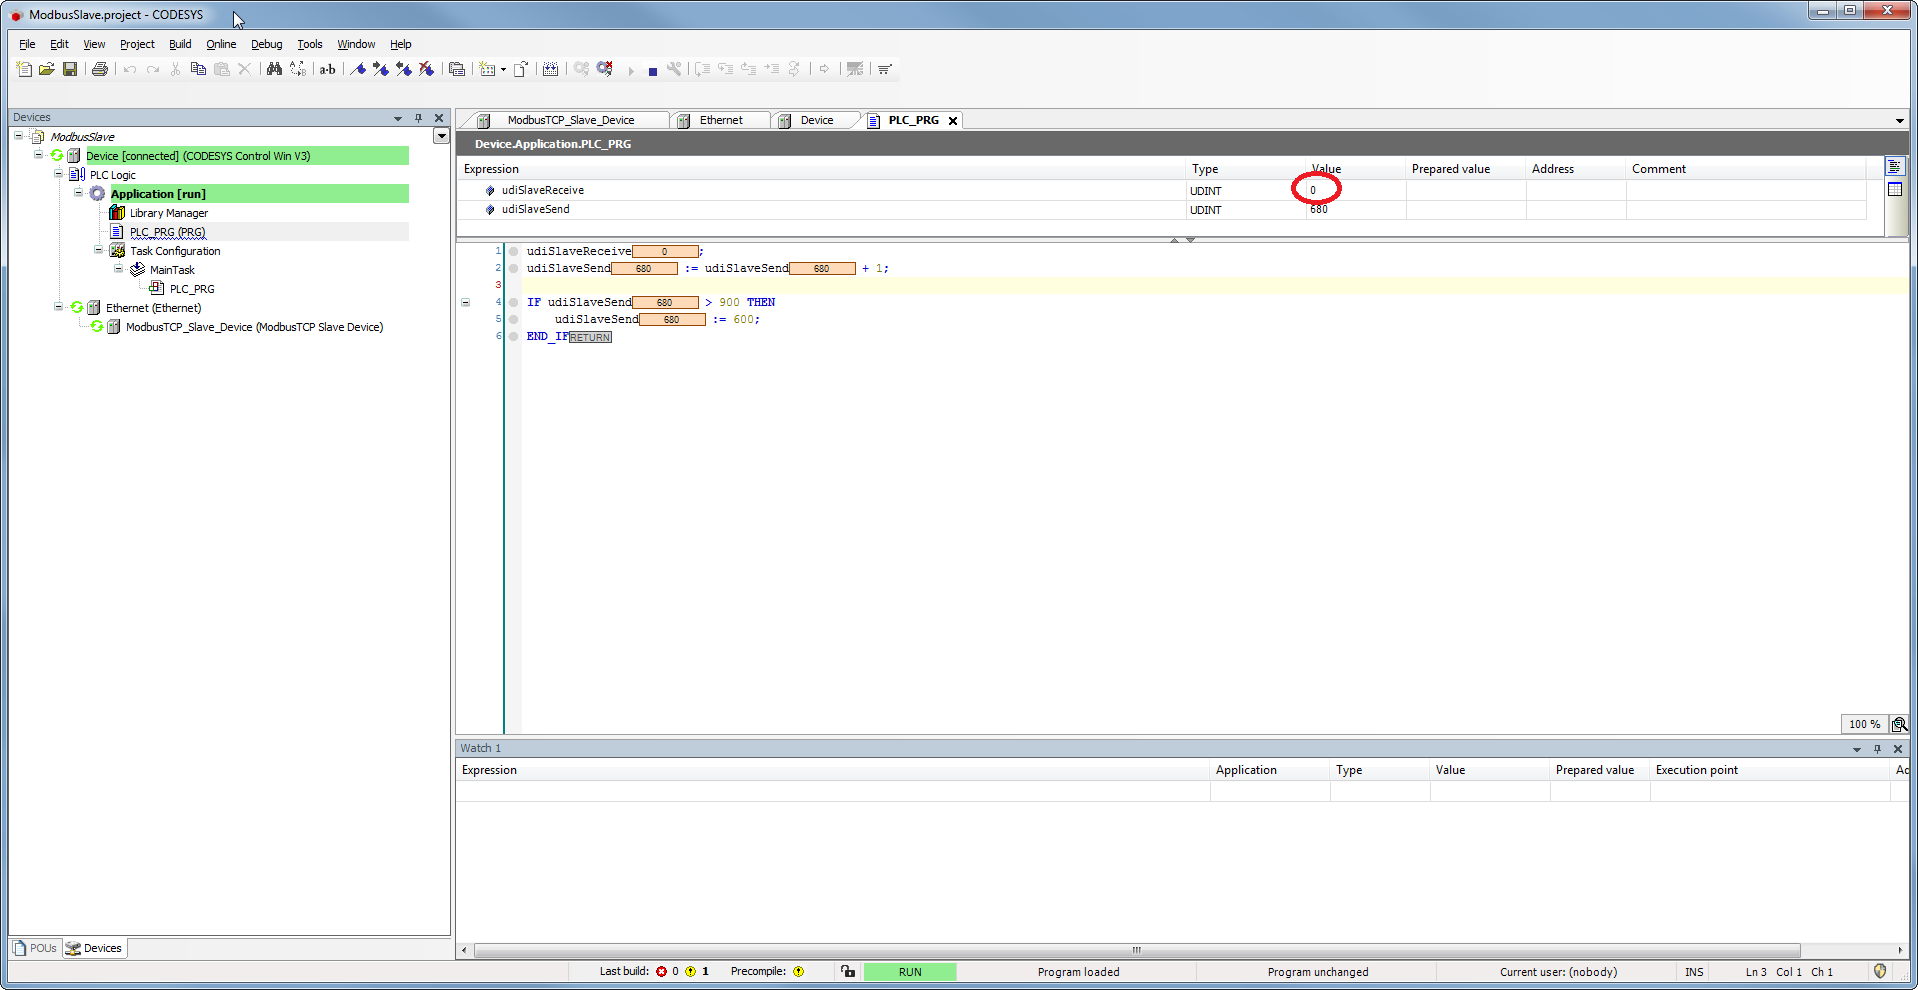
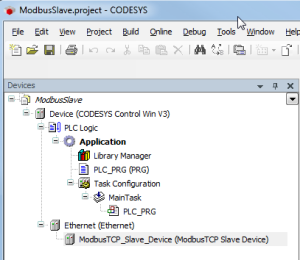
Requirements for the Modbus slave
- Create a "standard project" and select "CODESYS Control Win V3" as the device.
- Define the target system via Network search (see Modbus master).
- Insert an Ethernet adapter and a Modbus_TCP_Slave_Device in the device tree.
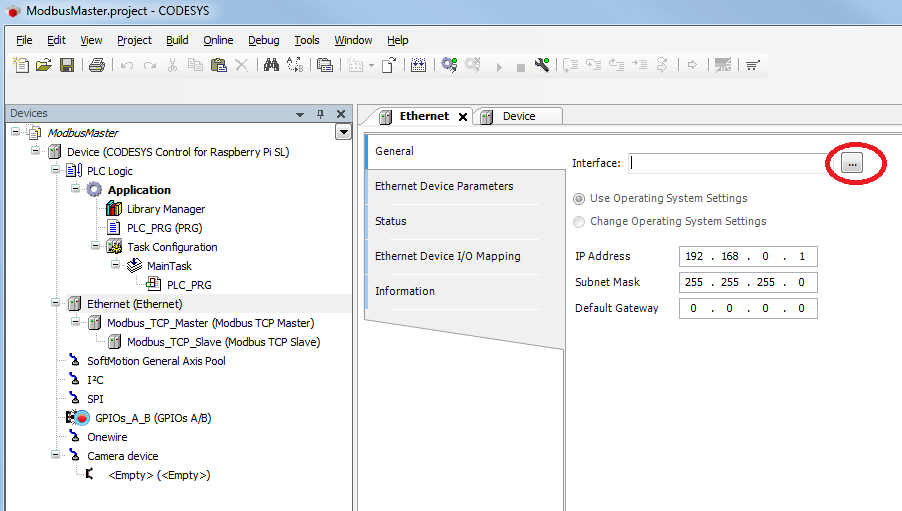
Setting on the Ethernet adapter (master and slave)
- Determine which interface is to be used.
If no target system is determined, an error message appears, "Gateway not configured"
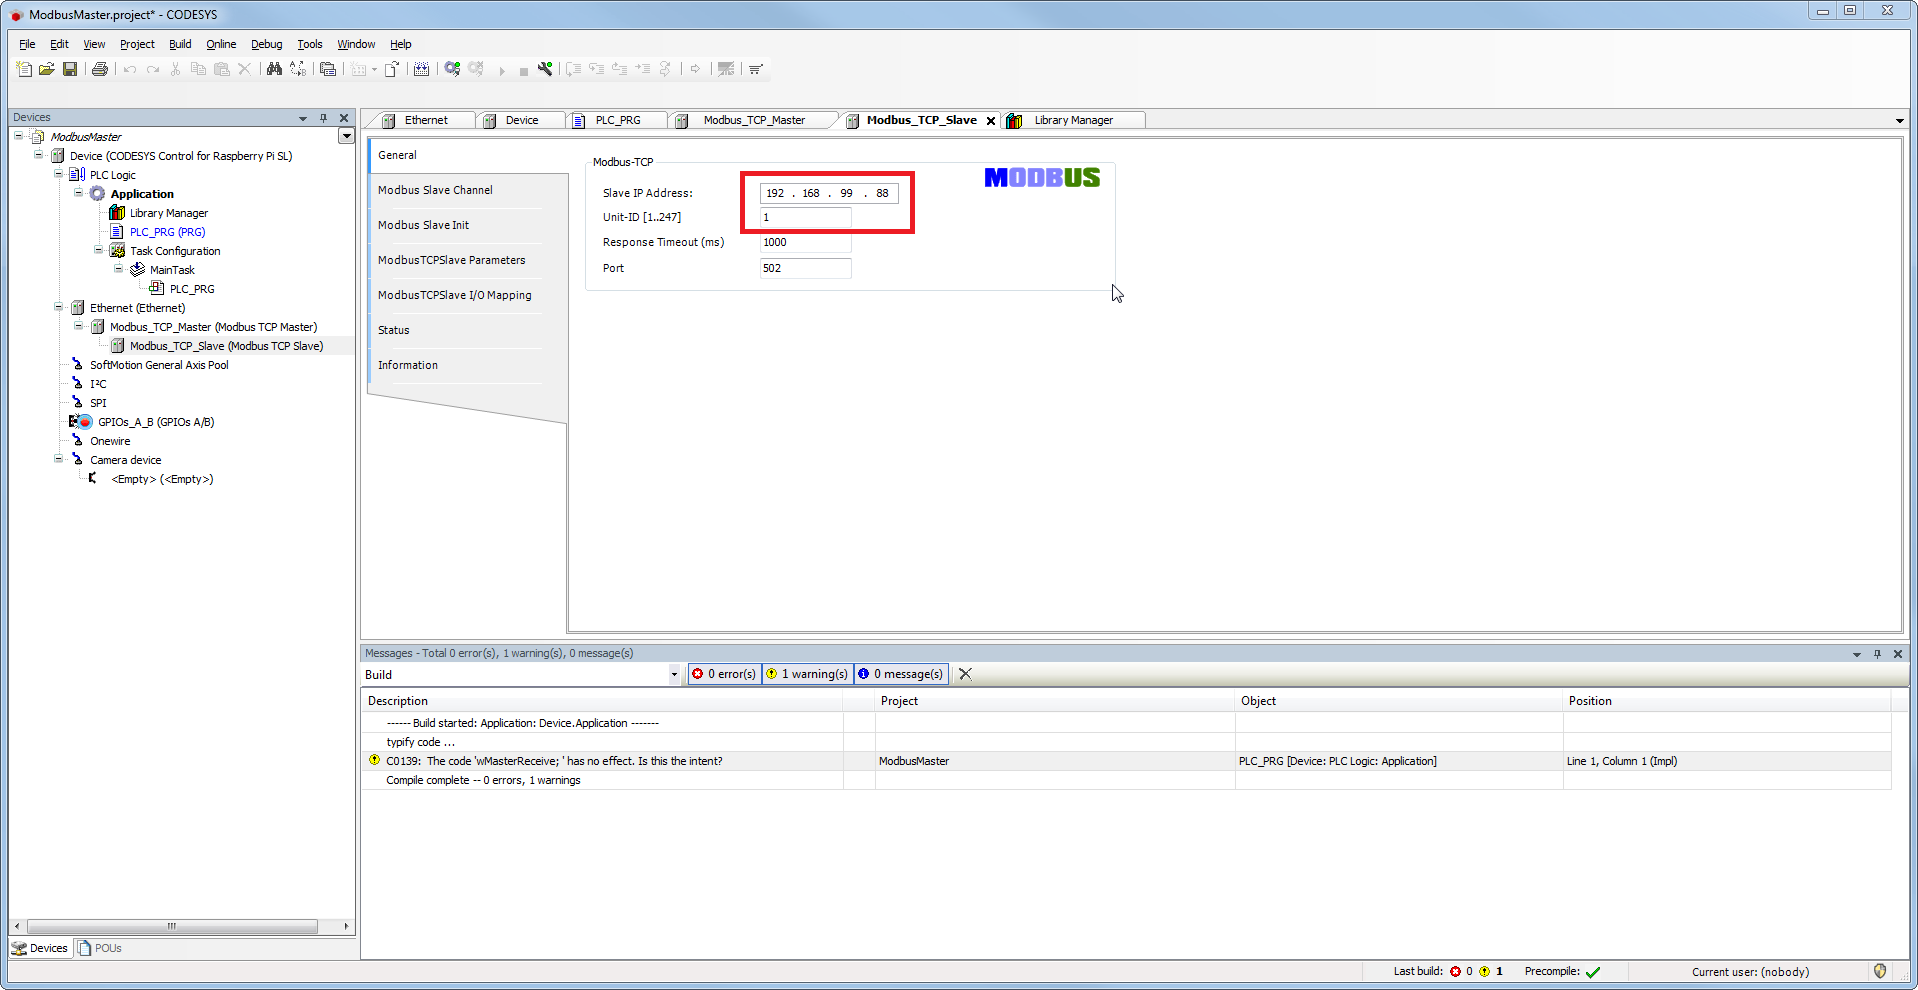
Setting on the Modbus_TCP_Slave (master)
Tab 'General'
- Enter the IP address of the slave device (in this case the CODESYS Control Win V3)
- Issue a unique ID for the Modbus configuration
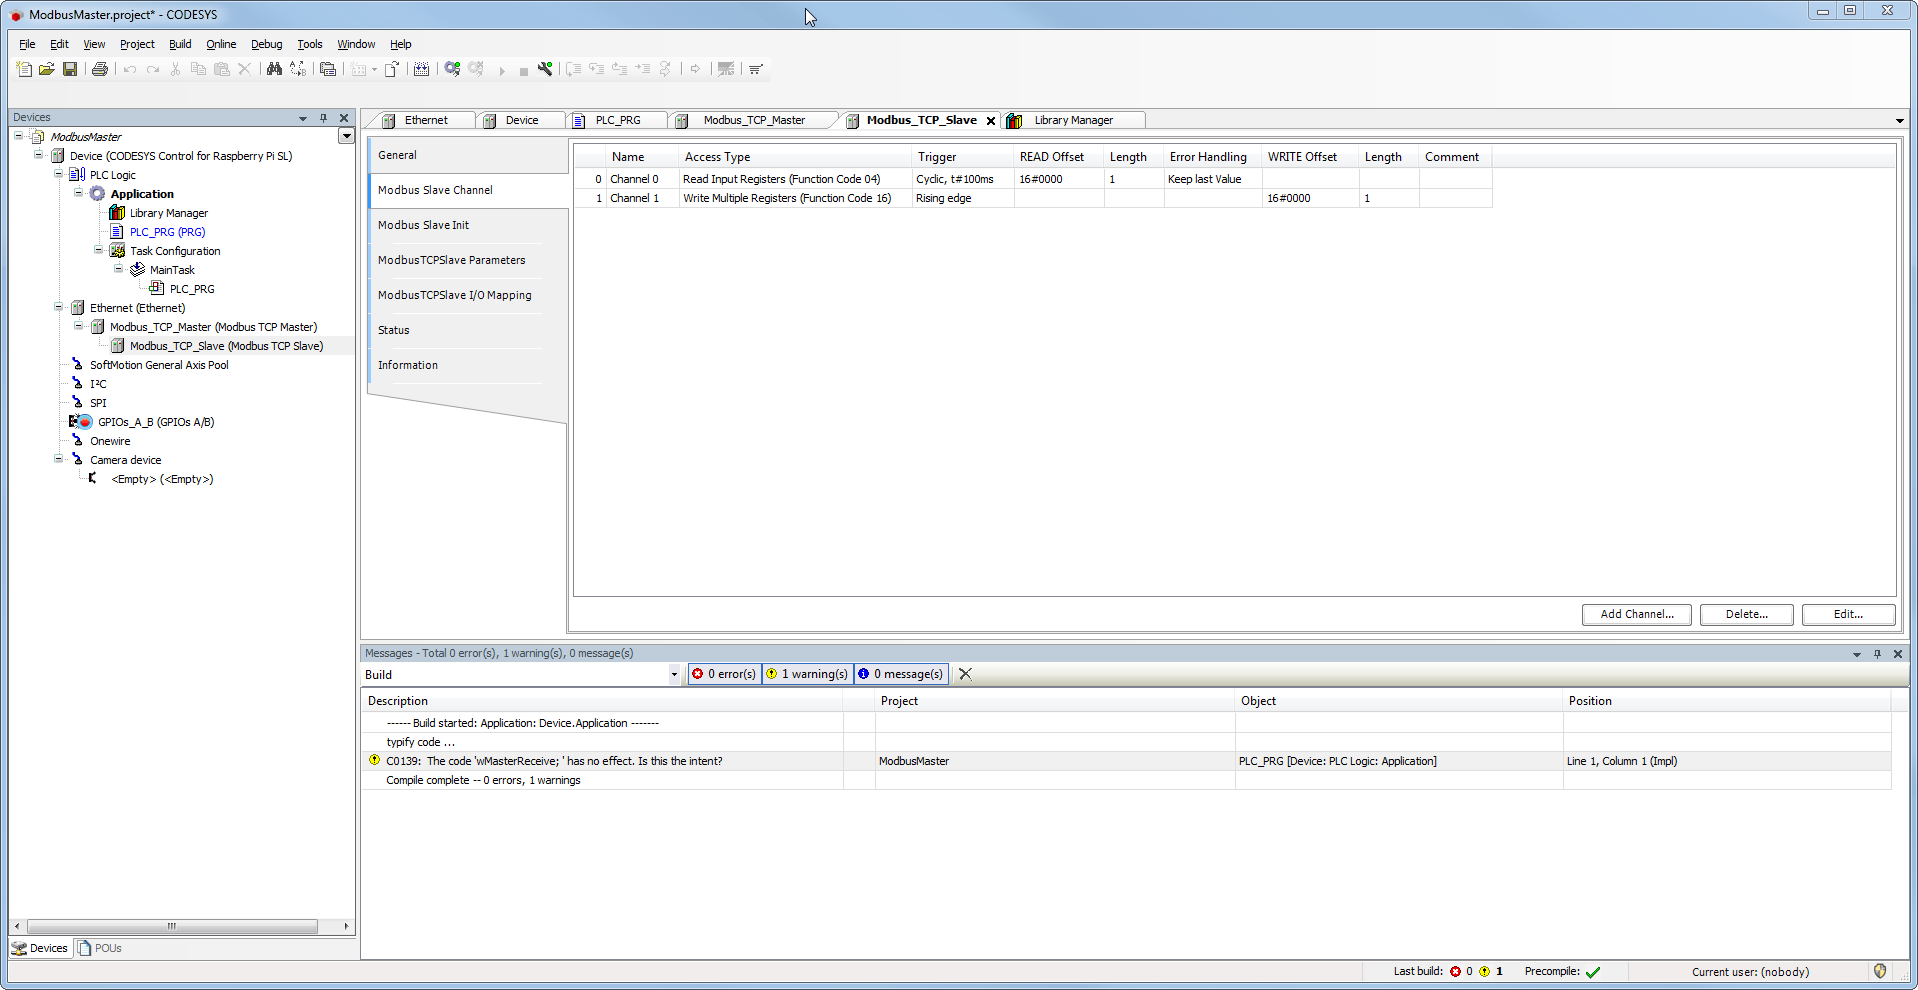
Tab 'Channel'
- Create an input register (counter that is sent by the Modbus slave device) – cyclic update every 100 ms.
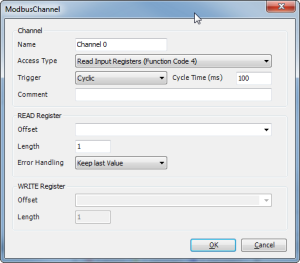
- Create an output register for writing your own counter.
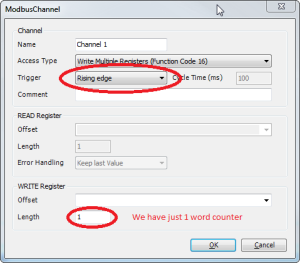
=> 
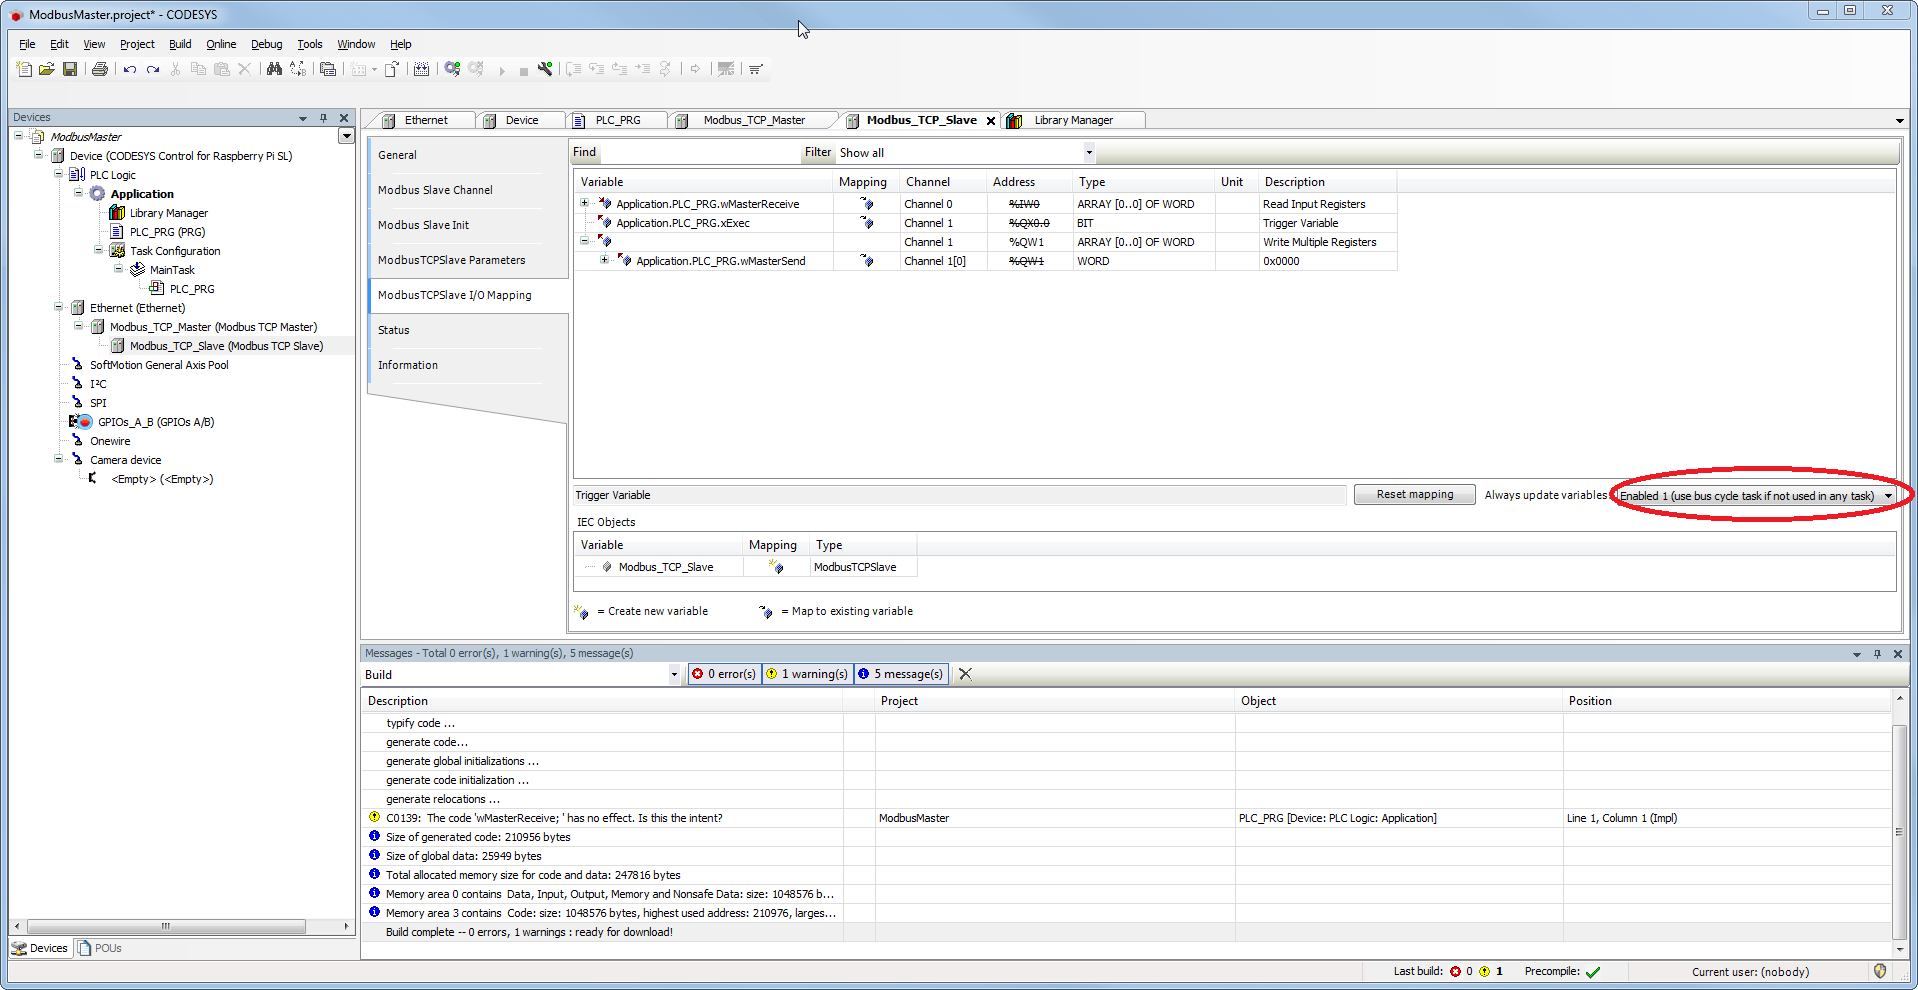
I/O mapping
- Assign input and output variables.
The setting of the option "Enabled 1" is necessary, since the variable "xExec" is not used in any task and writing would therefore not work.
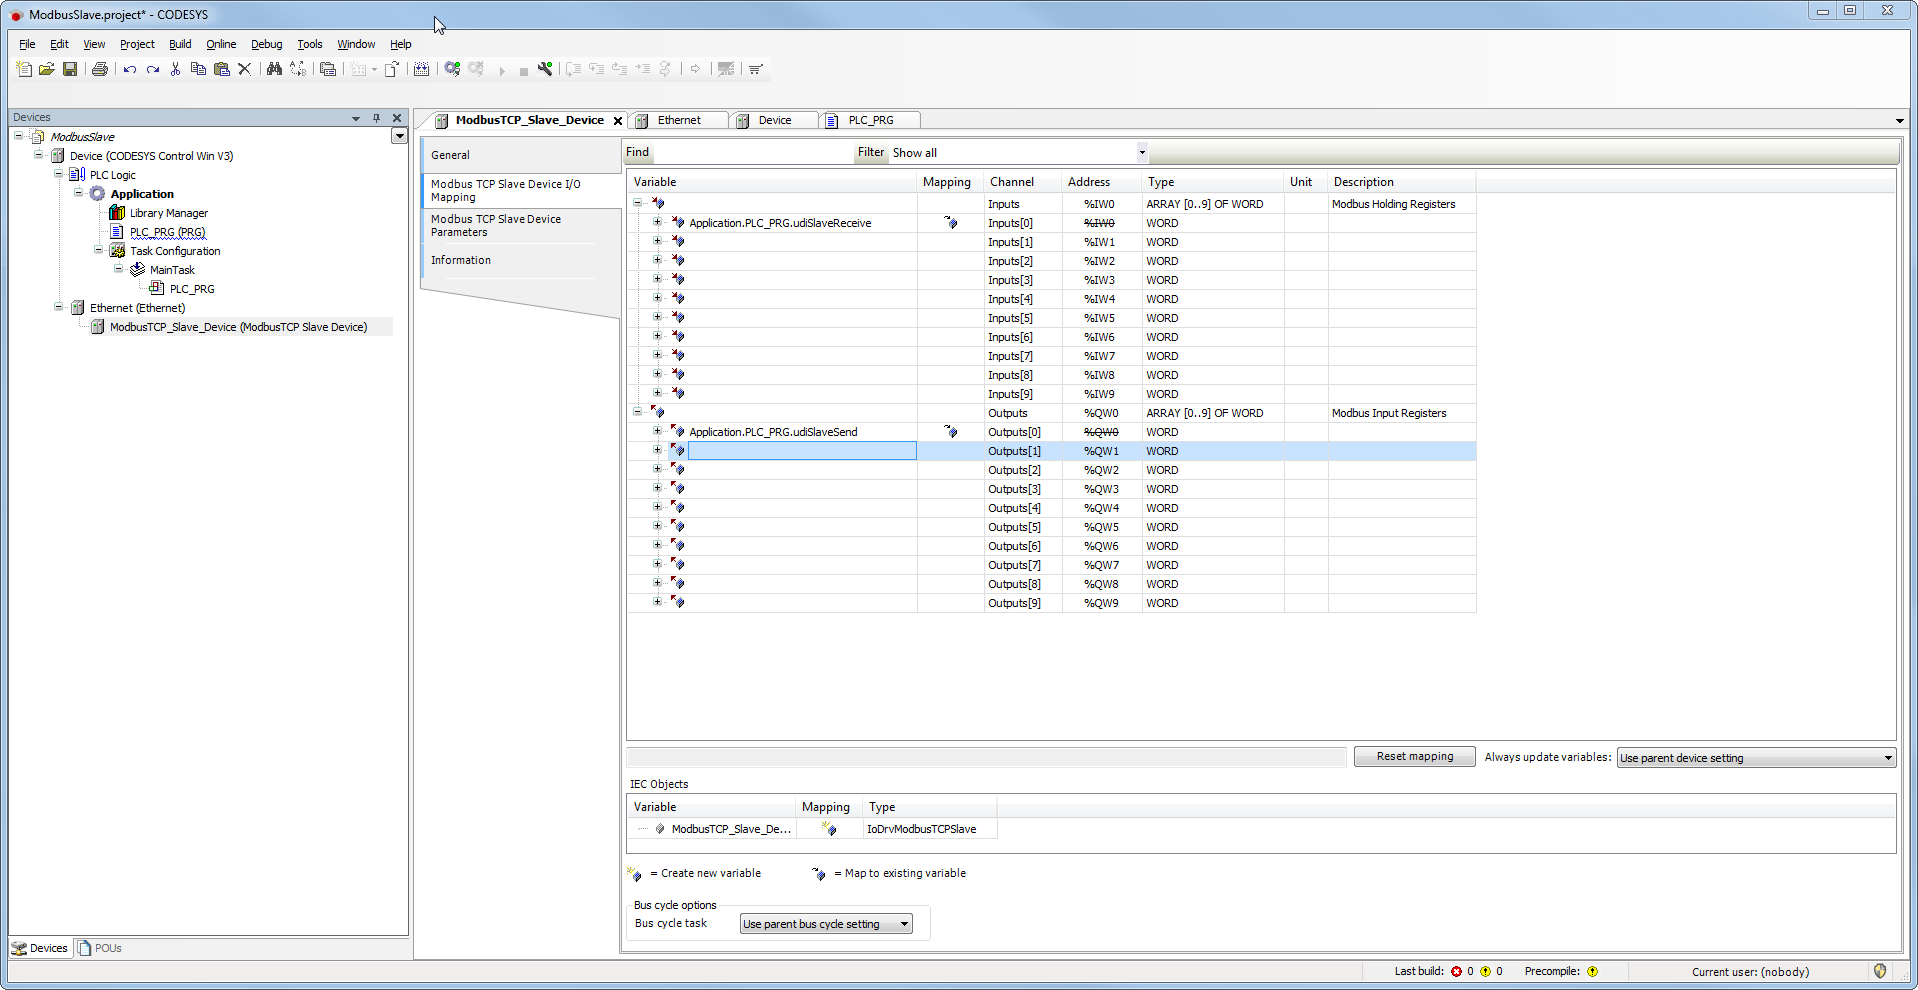
Settings on the Modbus_TCP_Slave_Device (slave)
Tab 'General'
Activate monitoring of the communication.
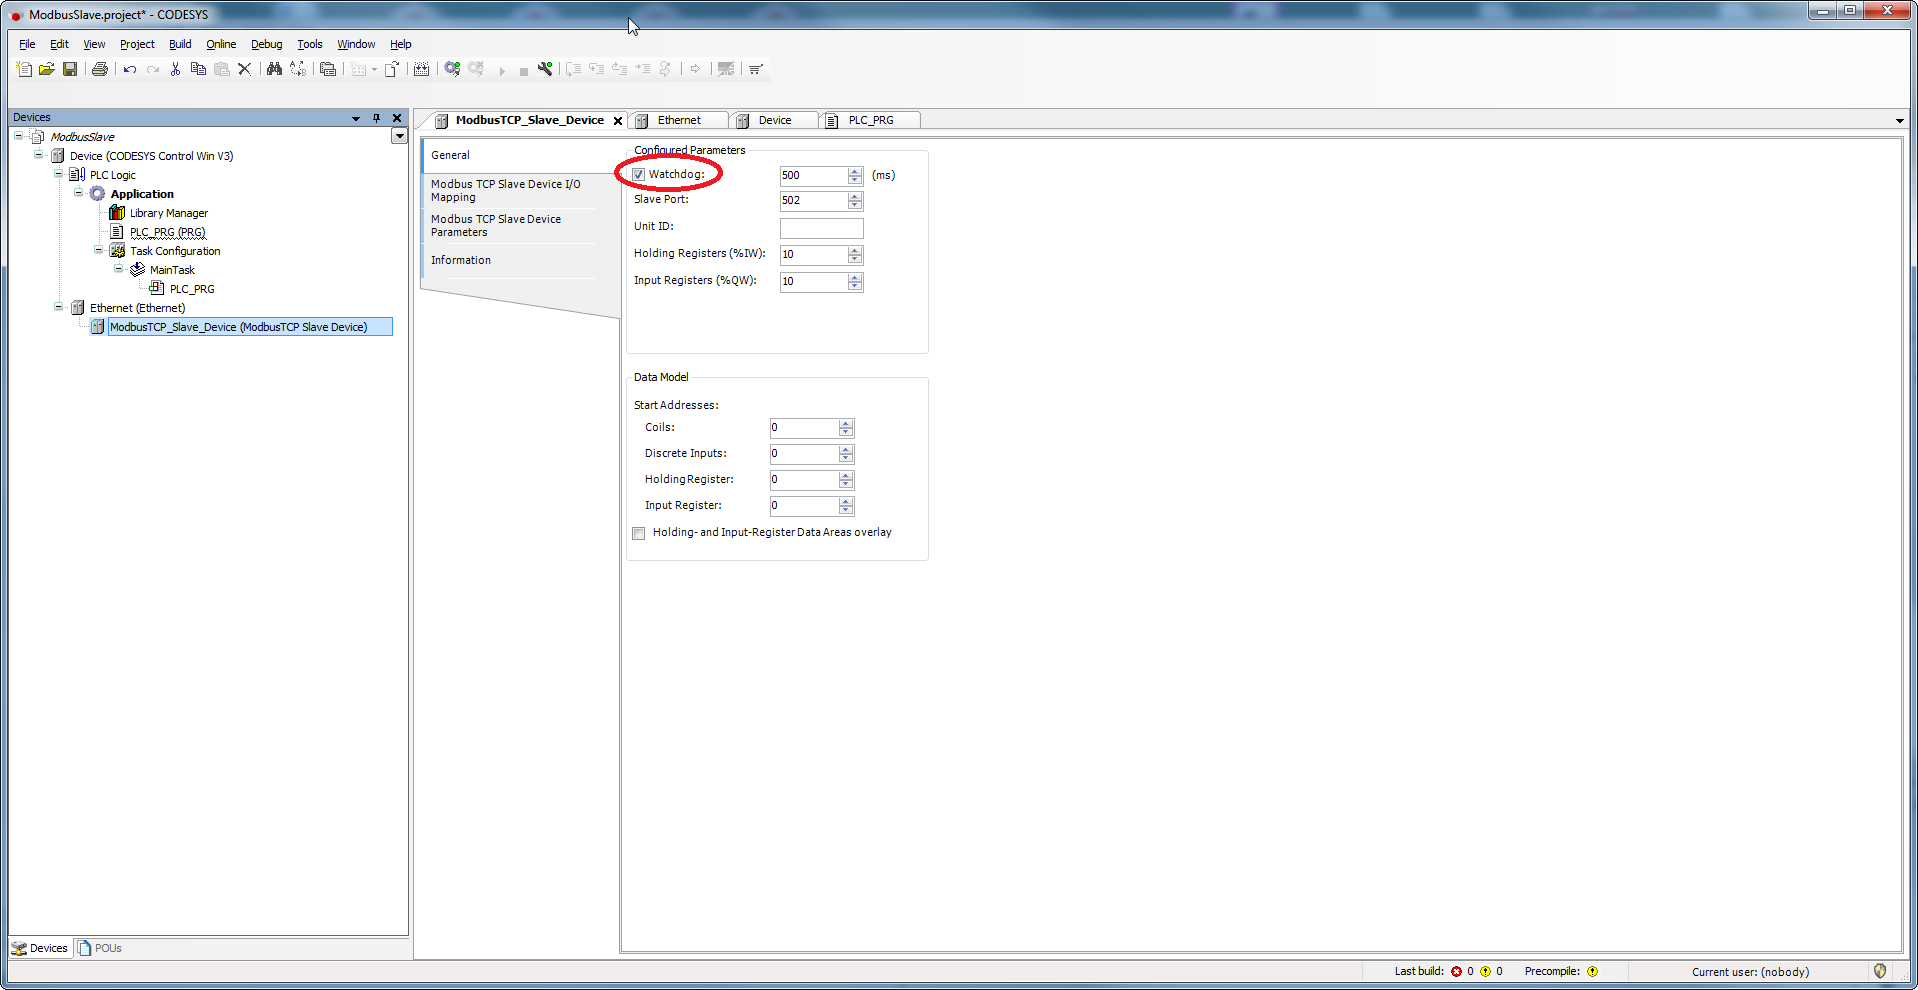
The unit ID must not be used for Modbus TCP!
This is only used for TCP/RTU gateways.The unit ID is only used for forwarding (gateway) to a Modbus Serial Bus.
For TCP/IP, the MODBUS-Server is addressed by means of the IP address. In this case, the MODBUS unit ID is not used (the value 0xFF has to be used).
For a serial connection, the Modbus devices are addressed with unit IDs from 1 to 247 (0 is used for broadcast addresses).
Tab 'I/O mapping'
- Assign input and output variables.
Downloading and starting the projects
Master
- Load the application to the controller.

Slave
- Load the application to the controller
The value changes only after transmission has been triggered manually in the master.