- Create a "Standard project" and select CODESYS Control Win V3 as the device.
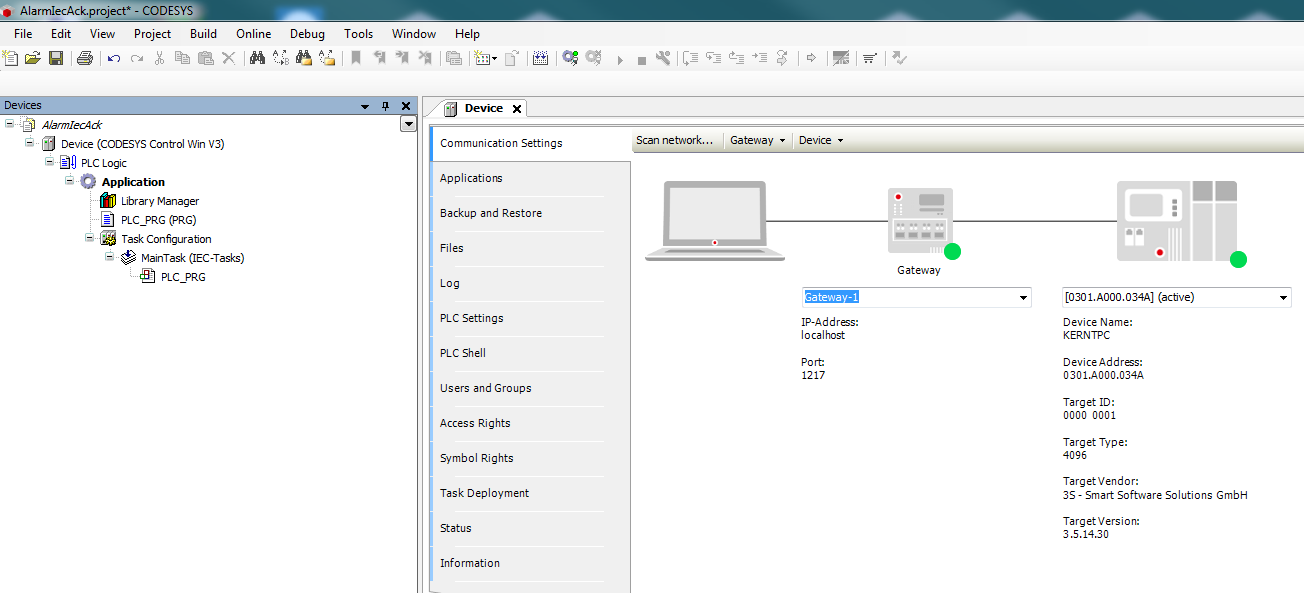
- Define the target system by means of the Network scan.
- Adapt the POU PLC_PRG as follows:
Declaration
VAR xCreateAlarm1 : BOOL; xCreateAlarm2 : BOOL; xCreateAlarm3 : BOOL; xCreateAlarm4 : BOOL; xAckAll : BOOL; xAckErr : BOOl; END_VAR - Insert an Alarm configuration in the device tree.
Here, the Error, Info and Warning, alarm classes are created automatically, as well as the AlarmStorage object.
In addition, an AlarmManagerTask is created.
Form the alarm classes, set the acknowledgement type to REP_ACK: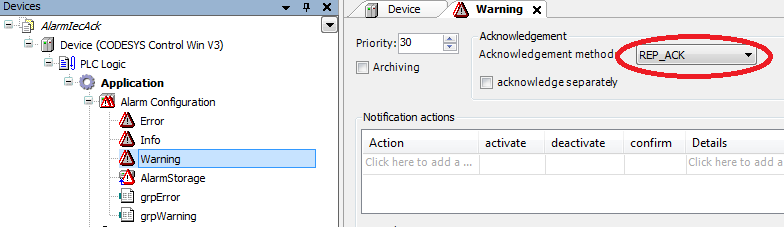
Insert two new alarm groups, grpError and rgrpWarning, in the Alarm configuration and configure the alarms as follow:

- Adapt the POU PLC_PRG as follows:
Implementation
If xAckAll Then
    xAckAll := FALSE;
    AlarmManager.g_AlarmHandler.AcknowledgeAll();
END_IF

If xAckErr Then
    xAckErr := FALSE;
    AlarmManager.g_AlarmHandler.AcknowledgeAllOfGroup(usiAlarmGroupID := Alm_AlarmConfiguration_Alarmgroup_IDs.ID_grpError);
END_IF
The alarm groups which you have created are provided in the SmartCoding view:

- Insert a visualization in the device tree.
Then the Visualisierung Manager is inserted automatically with the TargetVisu and WebVisu visualization types.
In addition, a VISU_TASK is also created automatically.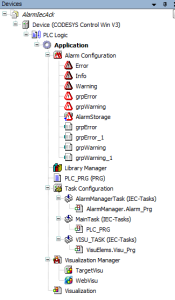
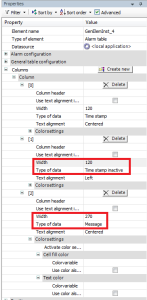
In the Visualization, set an Alarm Table element and configure the element as follows:
- Start the project and test the functionality.
Overview
Content Tools