- Create a "Standard project" and select CODESYS Control Win V3 as the device.
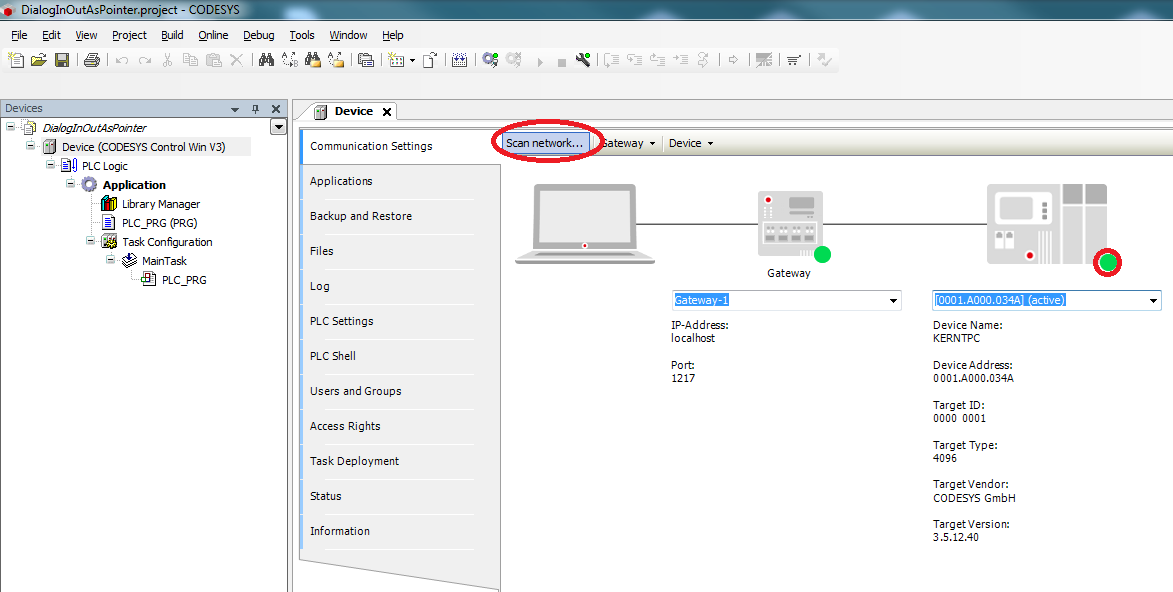
- Define the target system by means of the Network scan.
Create and edit an FB named FB_Sample as follows:
Declaration
FUNCTION_BLOCK FB_Sample
VAR_INPUT
    byInstanz    : BYTE;
END_VAR
VAR
    udiCount     : UDINT;
    xReset       : BOOL;
    udiValue     : UDINT;
    sText        : STRING := 'Input something';
END_VAR
VAR CONSTANT
    c_udiOffset  : UDINT := 10000;
END_VAR
Implementation
udiCount := udiCount+1;

udiValue := byInstanz * c_udiOffset + udiCount;

IF udiValue >= (byInstanz+1) * c_udiOffset THEN
    udiValue := byInstanz * c_udiOffset;
END_IF

IF xReset THEN
    udiCount := 0;
END_IF
Edit the PLC_PRG POU as follows:
Declaration
PROGRAM PLC_PRG
VAR
    fbSample1 : FB_Sample := (byInstanz := 1);
END_VAR
Implementation
fbSample1();
- Insert a visualization in the device tree.
Then the Visualization Manager is inserted automatically with the visu types TargetVisu and WebVisu.
In addition, a VISU_TASK is also created automatically.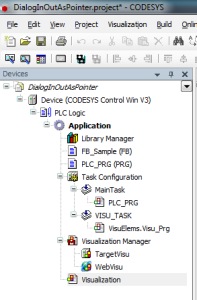
- Create an additional visualization named dlgSample.
From the context menu, open and set the properties dialog of the page as follows:
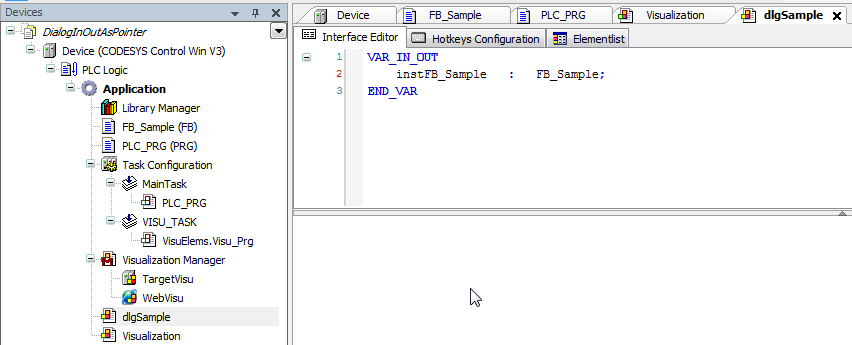
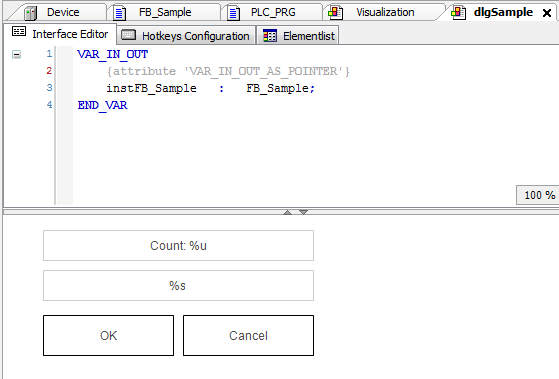
- From the Visualization/Interface Editor, open and edit the interface editor as follows:
Set a rectangle on the page for displaying the counter value and edit the properties as follows: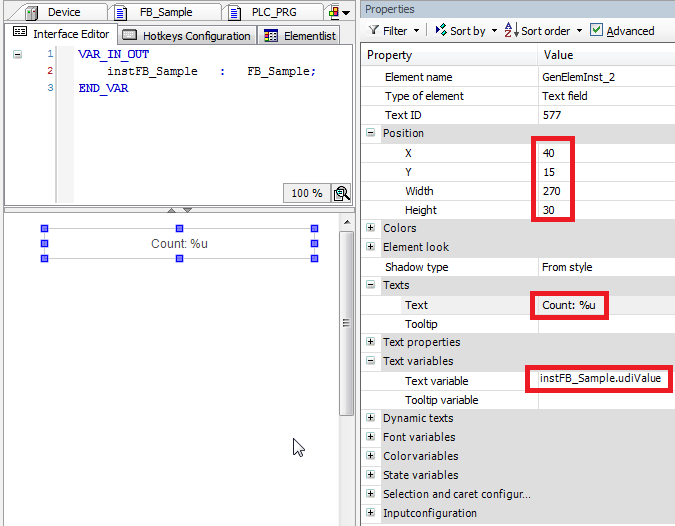
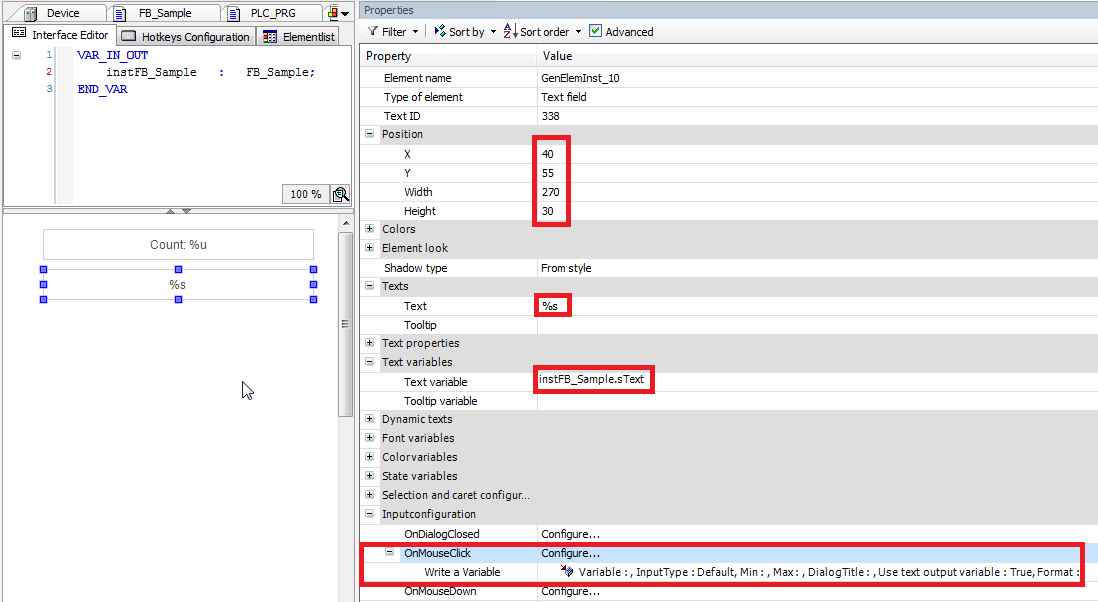
Copy the element and edit the properties as follows:
Set an additional rectangle element and edit the properties as follows: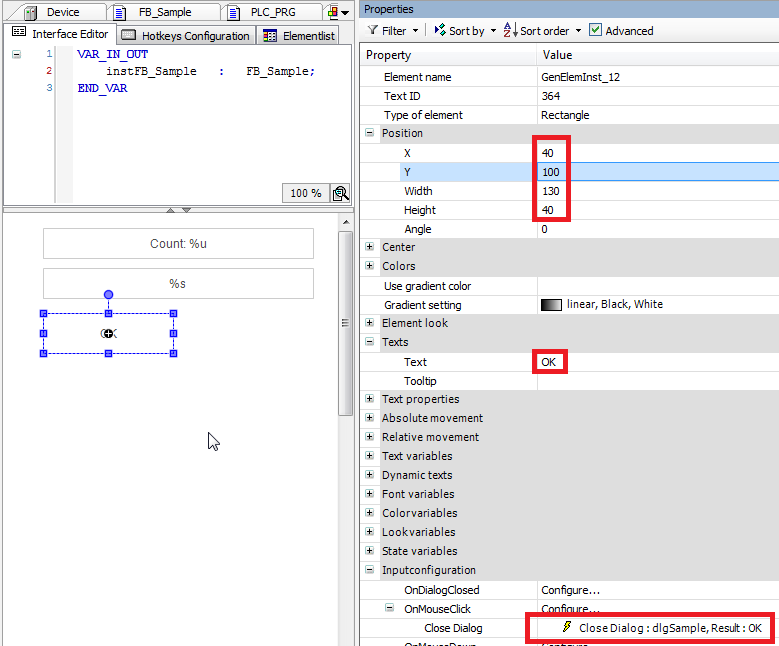
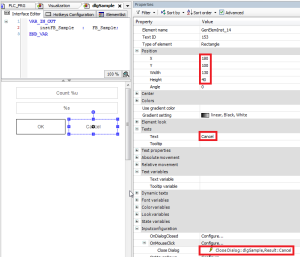
Copy the rectangle and edit the properties as follows:
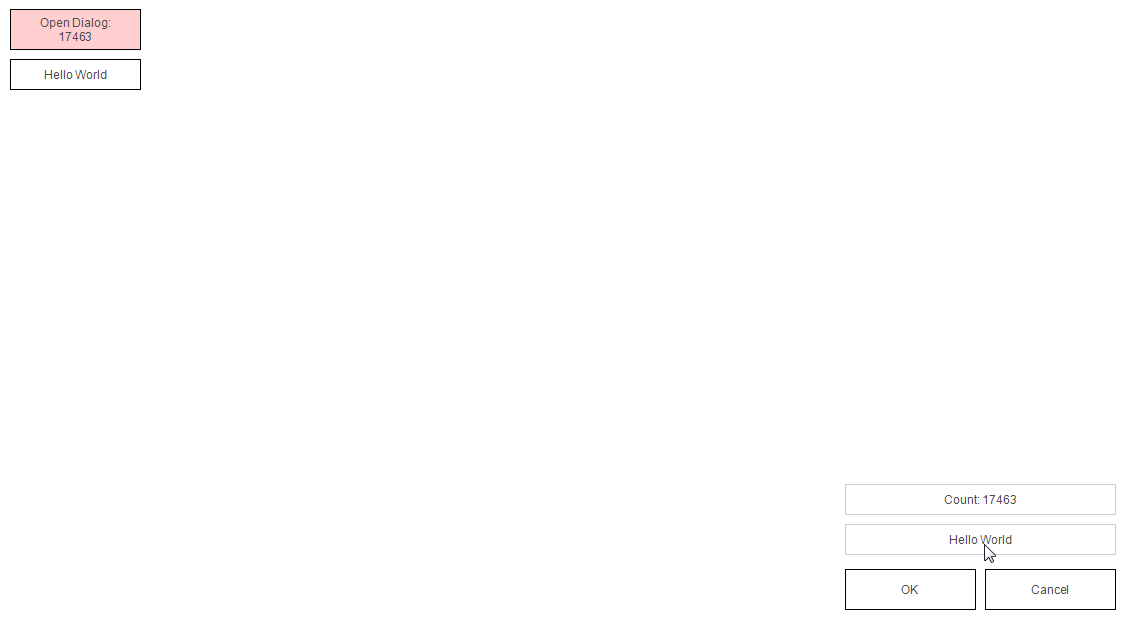
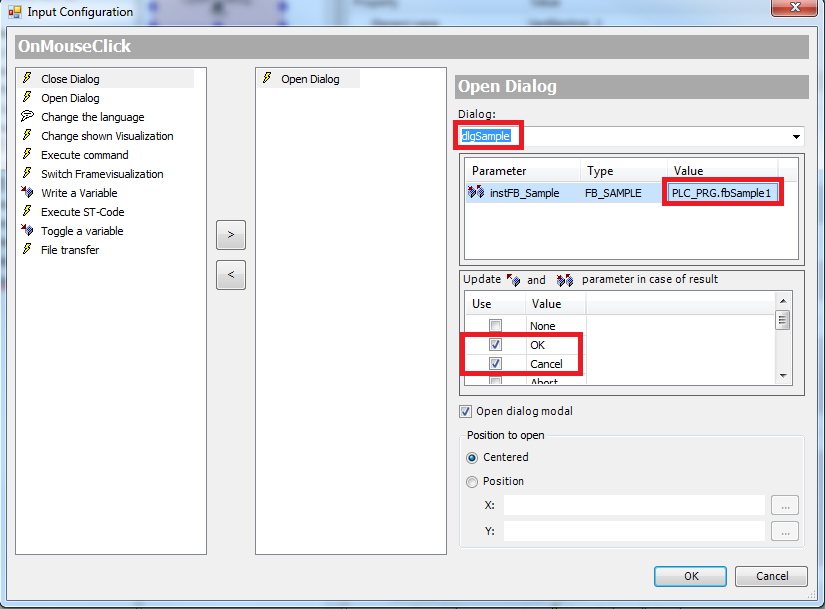
In order to display the current value of the FB and call the dialog, we edit the Visualization page.
Set a rectangle and edit the properties as follows:
The line break between the Open Dialog text and the variable formatting %u is made with the key combination [Ctrl] + [Return].
When assigning the input configuration, you also have to set the following properties in the dialog:
Set an additional rectangle on the page and edit the properties as follows:
Load the project to the controller and start it.
Now when you open the dialog, you notice that the values in the dialog do not change, or an adjustment of the text is not passed to the variable until the dialog is closed:
In order for changes between variables and dialog elements to be passed directly, the attribute VAR_IN_OUT_AS_POINTER must be added to the interface of the dialog, where by uppercase/lowercase must be taken into account:
After adding the attribute, you must execute Build/Clean all again and then download the program to the controller again.
Now the values should be updated "Online":