See our CODESYS Store product: AWS IoT Core Client
How to get started
- Install the “Security Agent” Addon form our CODESYS Store
- Choose from this list, an openssl binary to install:
https://wiki.openssl.org/index.php/Binaries - The first entry has worked well in tests Go to aws.amazon.com and sign up
Read all the docs with Amazon!
We follow slightly different steps.
- Click “All Services” and IOT Core
- Click “Manage”
- Click “Register a Thing”
- Click “Create a single Thing” and name it e.g. “jackicpi3lcd”
Create a type “CODESYS” / “Things connected with CODESYS”
Don’t bother with group, skip all the optional things and hit “next”
- Create the "Thing" without Certificate, and hit “Done”
- Open your "Thing" and go to “Interact”
- Copy the rest API endpoint under HTTPS,
e.g. “xxxxxxxxxxxxx-ats.iot.us-east-2.amazonaws.com” Go back to the main menu of AWS IoT,
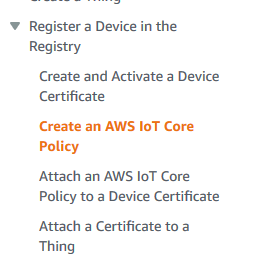
Under Menu “Secure > Policies”, press "Create new policy".Your account ID is different from the URL in the Rest API mentioned above!
It is given as the default Resource when you create a policy.- Name it LetJackPubAndSub
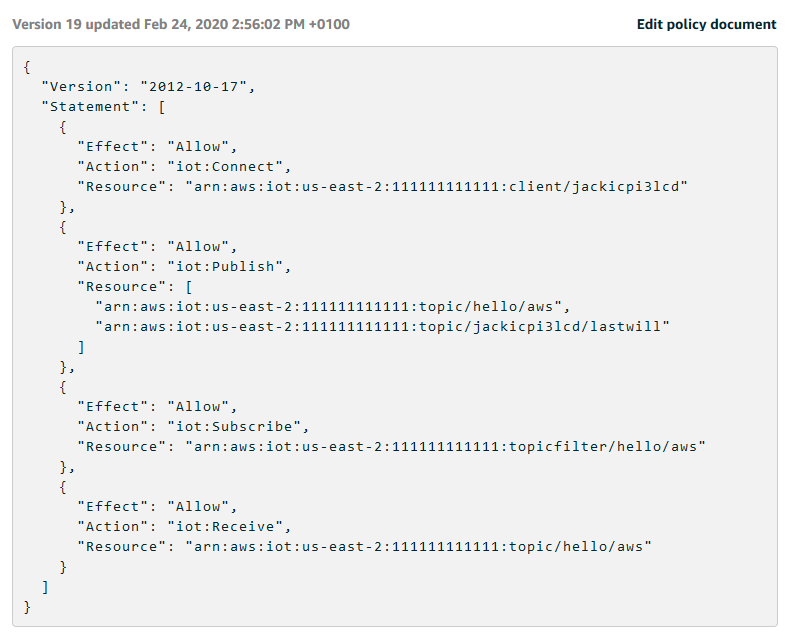
- You want to be able to connect with a client ID,
publish the topic and the last will, Subscribe to the topic, and then, once subscribed, you also want to receive messages from the topic. - Action = iot:Connect
- Resource ARN = arn:aws:iot:<AWS Region>:<AccountID, not same as Rest API URL>:client/jackicpi3lcd
- Effect = Allow
- Click Add Statement
- Action = iot:Publish
- Resource ARN = arn:aws:iot:<AWS Region>:<AccountID, not same as Rest API URL>:topic/hello/aws, arn:aws:iot:<AWS Region>:<AccountID, not same as Rest API URL>:topic/jackicpi3lcd/lastwill
- Effect = Allow
- Click Add Statement
- Action = iot:Subscribe
- Resource ARN = arn:aws:iot:<AWS Region>:<AccountID, not same as Rest API URL>:topicfilter/hello/aws
- Effect = Allow
- Click Add Statement
- Action = iot.Receive
- Resource ARN = arn:aws:iot:<AWS Region>:<AccountID, not same as Rest API URL>:topic/hello/aws
- Effect = Allow
- Click Create
- Example:
- CODESYS IDE: Run the installed example from
e.g. C:\Users\<USERNAME>\AWS IoT Core Client\<VERSION>\AWS_IoT_Core_Client_Example.project Right click the Device in Device Tree, select "Update Device...", then select your target PLC, before hitting OK
Important step for every example project!
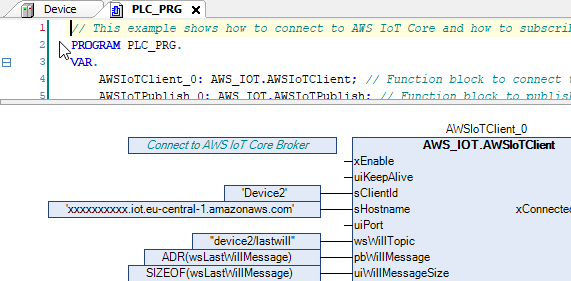
- Under the Application called AWSPubSub, Open the PLC_PRG and change these settings in the screenshot below to match the previously created "Thing"
- Change the two instances of ‘Device2’ to ‘jackicpi3lcd‘
- Change the Hostname to the one you copied from the interact tab
- Example before:
- Download and run
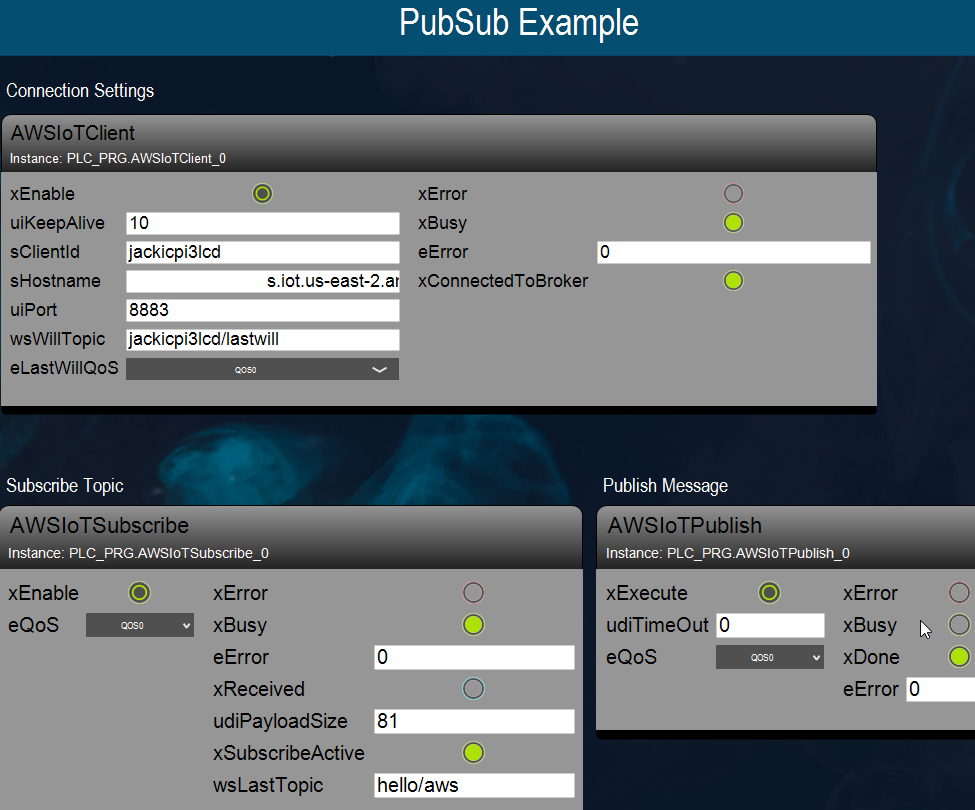
Open the visualization and select "xEnable" for the AWSIoTClient.
It will NOT show that it is xConnectedToBroker, because we haven't configured the permissions yet.
- Open the PLC shell:
Device -> PLC-Shell (OLH) - Specify cert-getapplist
-> A component with the specified device name and a number is displayed.
You want the one that says “jackicpi3lcd” Specify cert-createcsr <number> and use the number from the previous step.
The creation of the CSR file can take several seconds.
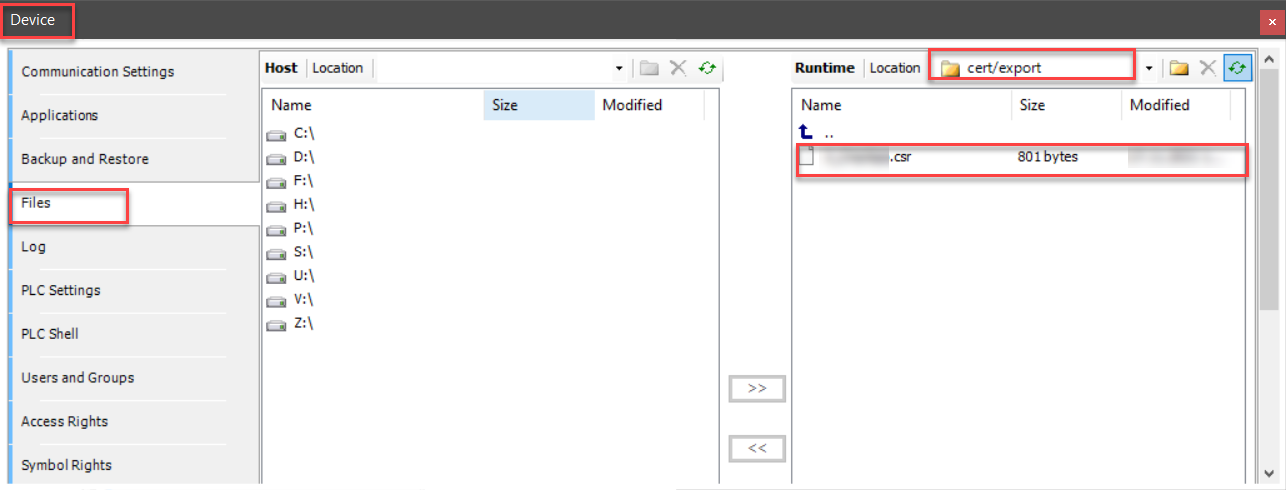
A corresponding message is displayed in the device log (Device -> Log (OLH)) after it has been created.- Open (Device -> Files (OLH)) and copy the CSR file from the cert/export directory to the local file system.
- Open a command prompt and type something like:
openssl.exe req -in "D:/prj/WIP/AWS IOT CORE/6_jackicpi3lcd.csr" -inform der -out "D:/prj/WIP/AWS IOT CORE/jackicpi3lcd.csr" - Go back to the AWS management console
- Open your "Thing" and go to the security console
- Hit “View other options”
- Hit “create with csr”
- Use the output from the above openssl command (“jackicpi3lcd.csr”)
- Hit “Upload File”.
If it doesn’t say successful after 10 seconds, you’ve grabbed the wrong file. Download the certificate it gives you
Depending on your browser, will actually save as .txt for some reason.
- Hit the link to download a root certificate.
Grab Amazon root ca1, Root CA3, and startfield Root CA Certificates. - Press Activate.
- Press Attach a policy
- Select the policy you created earlier
- Now it won’t have added the certificate to the thing for some reason..
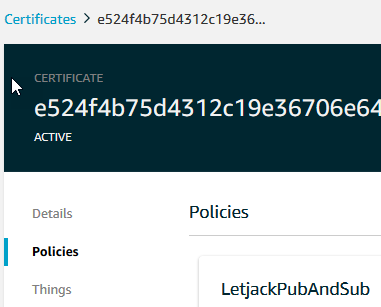
- Go back to the main menu and select Secure > Certificates, select the new one you made.
- Actions > Activate
- Actions > Attach Thing > jackicpi3lcd > Attach
- So now if you go to Manage > Thing > jackicpi3lcd, it should have a certificate under security.
If you click that it should have a policy under Policies, and the certificate should have the word “ACTIVE”. 
- Go back to the CODESYS IDE now.
- Security screen > Devices > Hit Refresh > Click on “Own Certificates”
- Press the button just to the left of Owned certificates that looks like a PLC with a green downwards arrow.

- Change the file filter to all files.
Change the extension of the file you downloaded from .txt to .crt, then select it and hit open. - Go to trusted certificates folder now, and install all three root certificates (same button) from Amazon.
Again, changing the filter if needed. - Cold reset the controller to take the new certificates.
- Open the visualization, turn on xEnable again for AWSIoTClient.
You should get a green “connected to broker” lamp. - Turn on xEnable the AWSIoTSubscribe
- Enable the AWSIoTPublish
- Now you should get the values, everything is good!
The topic and payload you send via Publish should be seen in the PLC_PRG.AWSIoTSubscribe_0